HUT BASED SKI TOURS

While much of the phenomenal backcountry skiing near Ouray, Colorado is easily accessed from your vehicle via Red Mountain Pass, there is even more waiting to be discovered a bit deeper into this spectacular range. The Mount Hayden Backcountry Lodge is located beyond the normal reach of a “day tour” and makes for a perfect basecamp to explore some of the skiing highlights of this area. Accessed from a few different points, this lodge sits at 11,000 feet in Richmond Basin, loaded with great ski terrain in all directions. It is a perfect place to disconnect from your busy life and re-connect with powder on a multi-day ski trip in the comforts of a beautiful, modern back country lodge in a stunning location. There are many huts and lodges in the San Juans to choose from, but the Mount Hayden area has hands down the best ski terrain in the area, only matched by the warm charm of the charismatic host, Eric Johnson.

THE HAUTE ROUTE

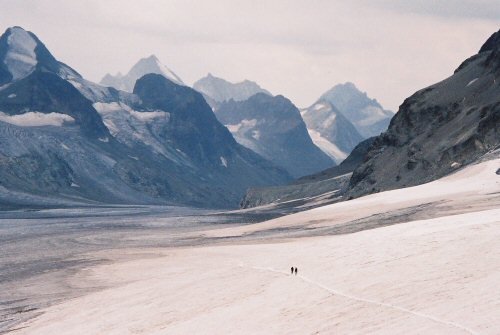
This is THE Iconic hut to hut ski tour connecting the mountain hamlets of Chamonix, France to Zermatt, Switzerland. It’s an all time classic ski tour!
Dates: April 8–13
Cost: $3,800
Details:
  • Transportation from the Geneva airport to Chamonix
  • Two nights lodging in Chamonix
  • Lift tickets to the Grand Montets ski area, and all lift tickets while on the Haute Route
  • 5 nights in mountain huts (Argentiere, Triente, Prafleuri, Dix, Vignettes) with pack lunch for the day including 1 liter of water
  • 1 night accommodation in Zermatt with an awesome fondue dinner
  • Luggage transfer from Chamonix to Zermatt (so our gear is waiting for us when we arrive)
  • Airport transfer from Zermatt to Geneva
  • All guide accomodations and wages

Conditions can vary day by day, and season to season. However, unlike the American Rockies, the snow conditions set up faster after storms and are generally more stable.

Courtesy of https://en.wikipedia.org/wiki/Haute_Route

PERSONAL GEAR YOU NEED TO BRING:

• Climbing harness with belay/rappel and gear loops.

• Climbing helmet.

• Belay device.

• Two locking carabiners.

• Crampons for technical climbing. (Step in, not strap on)

• Technical ice tools, with hammers. An adze on a tool creates a significant risk to you. If you don’t have a hammer, you may cover the adze with tape and foam so it can’t cut your face if it pops out.

• Ice Tool tethers. This is a long elasticized leash that prevents you from dropping an ice tool. (optional)

• Climbing boots. These must be mountaineering boots. Leather hiking boots won’t work. Good quality climbing boots can be rented from Ouray Mountain Sports. Contact them directly to reserve at (970) 325-4284.

• Hooded shell jacket. A waterproof/breathable (hard shell) jacket is desirable when climbing water ice. If you use a soft shell jacket make sure it is freshly washed and dried as the drying helps to restore the water repellent finish. If we climb in a soft shell we often carry a light waterproof/non-breathable shell such as the Alpine Houdini jacket made by Patagonia.

• Technical climbing pants. Soft or hard shell. Should fit closely around the tops of your boots.

• Gaitors. Nice if your pants are baggy and/or don’t have integrated gaitors to keep the snow out. (optional)

• Synthetic long underwear top and bottoms. Two different weights for different temperature conditions.

• Synthetic mid-weight top. Slightly heavier than the above layer. The Patagonia R1 Hoody is a popular example.

• Warm fleece or sweater top.

• Warm insulating down or synthetic parka that can be worn over all other layers.

• A warm hat which can be worn under your helmet.

• Neck gaiter. Optional, but recommended.

• Two to three pairs of good fitting, non-bulky, warm climbing gloves and mittens. Gloves/mittens usually get wet or damp when ice climbing and it is nice to have a back-up pair with you at all times. Personally we bring two pairs of gloves and one pair of mittens for a day of winter climbing. One thin pair of gloves that are protective but not very warm; these get the most use. One medium pair of gloves that are warmer, but we can still climb with. And one pair of mittens for belaying and for extra cold days. Ski gloves usually have too much material in the palms for climbing.

• Thin synthetic or wool liner gloves. (optional)

• Wool socks to wear in climbing boots. A second thin pair of liner socks is optional for those who tend to get cold feet.

• Sunglasses.

• Sunscreen.

• A 30-40 liter backpack to carry extra clothes, water and food for the day.

• Small headlamp.

• A small personal first aid kit containing bandages and a blister kit.

• Water bottle and/or thermos: You should have one to two quart/liter capacity.

• Lunch/snack food. When climbing in the Ice Park, it is possible to go into town for lunch.

• Camera!

• Bathing suit for hot springs.

IMPORTANT:

Let us know what you DO NOT have. We may have it.

EQUIPMENT WE PROVIDE:

Ropes, protection, slings and other team technical equipment.

The Ice Clinic Workout:

Pull-ups, 5-15 reps, 30 seconds rest. Then:

Strict sit-ups. 10-15 reps, 30 seconds rest. Then:

Isometric Ice-Tool Hangs. 15-20 second one-armed hang off each tool. It helps to wear the gloves you’ll wear climbing. If you can’t do this one-armed, then do it with both arms, but shift more weight to one side at a time for the required time for each side. 30 seconds rest. Then:

Push ups, 10-15 reps, 30 seconds rest. Then:

Repeat circuit three times with a 3 minute rest between laps of the circuit for one workout. Do this workout twice in the first week.

Repeat circuit four times with a 3 minute rest between circuits for one workout. Do it twice a week the second and third week. In week 3 reduce rest between circuits to 2 minutes

Repeat five times the fourth and fifth week. In week four take 2 minutes rest/circuit. In week five take a 1 minute break between laps of the circuit

The sixth week do the workout only once. Do four laps of the circuit with two minutes rest between laps to allow for recovery and super-compensation.

Why pull-ups and push-ups? Because these simple exercise works all the main muscles-groups involved in swinging, and holding onto, an ice tool. If you can’t do five pull-ups, you may want to contact us about a customized strength training plan.

IInterested in a more structured approach to training?

• Read Steve House’s and Scott Johnston’s Book: Training for the New Alpinism

• Check Out Uphill Athlete’s training and coaching options